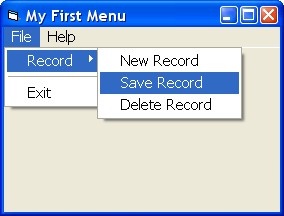
Adding Menu's, Sub-Menus and Menu Separator at Design Time in Visual Basic 6
This is a quick guide for beginners on how to add Menu, Sub-Menu and Menu Separator at Design Time in VB6 Project.
To do this, Open up your Microsoft Visual Basic and start a New Standard EXE Project that will automatically create a form named Form1.
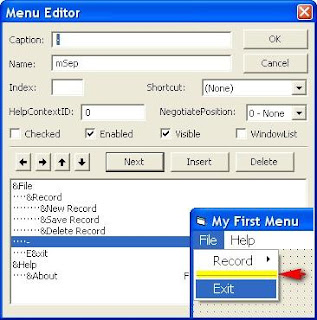
1.) First, right click on form then choose Menu Editor or Press Ctrl+E.
2.) On the Menu Editor, add a Main Menu Caption like "File" and give it a name like "nFile" then click Next.
3.) Click the right arrow button to add a menu under the main menu "File".
4.) Now create the First Level Menu and give it a Caption like "Record" and a name like "mRecord".
5.) Now to create a Sub-Menu for the menu Record, click the next button and the arrow button. As you can see in the list below that it is nested.
Note: You can use the arrows to move your menus up, down, left or right.
6.) Now to create the Menu Separator, just click next and give a Caption "-" and a name "mSep".


Comments
Post a Comment